Email Content Styling
Our Verification Email Management Tool uses the Apache Velocity template engine. This means that the Velocity Template Engine can be used within your email templates in addition to HTML and CSS.
The following Velocity variables are already available for use within the template:
${erroblock}– Contains the document review rejection reason(s). Only available for Failure Email.${uploadUrl}– See Document Upload URL Try Again Link section${FIRST_NAME}– Contains first name for the verification request${LAST_NAME}– Contains last name for the verification request${BIRTH_DATE}– Contains the birthdate for the verification request${EMAIL}– Contains the email for the verification request
Document Upload URL Try Again Link
We recommend providing users with the option to upload additional documents in the event their document is rejected by document review. The way we do this is by providing a try again link within the Failure Email. The try again link sends users directly to the document upload page portion of the verification flow and includes an uploadToken (as a query string parameter) to be used with the upload request.
Conveniently, if the following email template configuration is used, our Verification Email Management tool will automate the uploadToken generation and append it to the try again link:
- In the
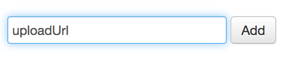
Add configuration keyfield at the bottom of the email template:-
- Add the configuration key uploadUrl to the email template
-
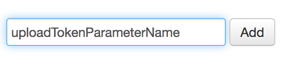
- Add the configuration key uploadTokenParameterName to the email template
-
- In the newly created
Upload Urlfield, enter the URL to the document upload page on your site. - In the newly created
Upload Token Parameter Namefield, enter the name of the query string parameter to be used for the uploadToken.
Example:
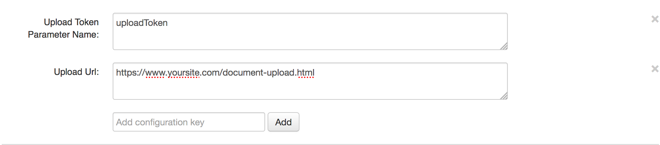
With the email template configured in this way, ${uploadUrl} can be used within the Failure Email as your try again link. In the example above, ${uploadUrl} would render in the email as:
https://www.yoursite.com/document-upload.html?uploadToken=${uploadToken}
where ${uploadToken} is a generated upload token.
If you don’t want to use ${uploadToken}, you can use requestId instead:
Example: https://www.yoursite.com/document-upload.html?requestId=${requestId}
Using the requestId is useful if you want to load more information about the person visiting your website into your upload page. If you saved the requestId in your own database along with things like the person’s first name, last name, affiliation, and/or organization, you could use the requestId to look up that information and load that dynamically into your own upload page.
Document Rejection Reasons
Providing users with visibility into why their document review was rejected will help them upload a qualifying document on their next document upload attempt.
To access document review rejection reasons/errors for a specific verification request, the Inquire endpoint can be used. After a document has been reviewed and rejected, the document review rejection reasons/errors will be included in the “errors” key within the VerificationResponse object, as illustrated below:
"errors": [

{

"code": 30,

"message": "Document does not display current or valid date",

"propertyName": null

}

],
This information should be included in the failure email template.
Limit Document Upload Retries
Our standard practice is to only allows users to upload documents up to three times (the initial document upload and two “retries”). If this is desired behavior, use the following email template configuration:
- In the
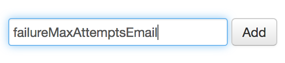
Add Configuration keyfield at the bottom of the email template:- Add the configuration key
failureMaxAttemptsEmail
- Add the configuration key
failureMaxAttemptsEmailSubject
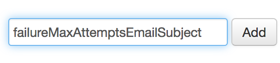
- Add the configuration key
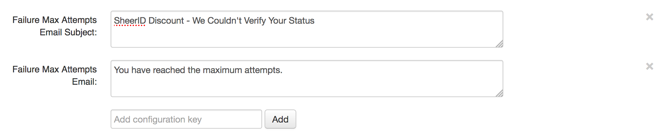
- In the newly created “Failure Max Attempts Email” field, add the desired HTML-based email content for the max attempts (no tries remaining) email.
- In the newly created “Failure Max Attempts Email Subject” field, add the desired subject line for the max attempts email.
Example:
In addition to configuring the email template, the API Verify request will need to include the parameter _maxAssetReviews=3. If this parameter isn’t included in the Verify request, this behavior will not work.
With the parameter set to 3, when a user’s third document is rejected, the Failure Max Attempts Email is fired instead of the Failure Email.
Email Header Customization
The following configuration keys are full customizable:
emailFromName– Sender NamefailureEmailSubject– Failure Email SubjectfailureEmail– HTML Failure email bodysuccessEmailSubject– Success Email subjectsuccessEmail– HTML Success email bodyuploadUrluploadTokenParameterName
Both uploadUrl and uploadTokenParameterName keys are pre-configured but should only be overridden for API integrations and hosted upload-only pages.
The default sender address is “verify@sheerid.com”. If you wish to change this, for example, to “sender@sheerid.com”, the following configuration keys can be customized:
emailFromAddress– Sender address
- Log in to SheerID Control Center
- From Account Home Page, select “Verification Email Management” from the “Tools” Section.
- Fill out the form to create an Email Notifier.
- After creating, find the Email Notifier under “Emails” tab and click “Edit”. On the EmailFromAddress key, you can change “Verify@” to anything you wish.
Custom Sender Email Address
With coordinated effort with SheerID, SheerID-generated emails can be configured to use a custom sender address (i.e. [email protected]). To enable the use of a custom email address, a verification email from SendGrid is required to approve the email address. As such, having access to the custom email address is a requirement. See SendGrid Senders for how we use SendGrid to verify a customer sender email address.
Additionally, through a similar process of verifying a single email address, an entire domain can be verified and approved to be used as a sender address. We recommend against this approach since this will enable email address such as [email protected] and [email protected] to be valid sender addresses. However, if you wish to verify an entire domain, an additional SPF record will need to be included in your domain’s DNS record. To prevent messages from being marked as spam, we also recommend including a DKIM record to your domain’s DNS record. See SendGrid SPF Records for guidance on adding SPF records.